
Smart STB Setup Guide For LG & Samsung TVs

Smart STB is an IPTV app which can be installed on Samsung, LG, Philips and many other Smart TV`s. This app enables you to have IPTV service on a portal just like MAG setup boxes with all characteristics that can be expected from MAG and Stalker Portal. What is MAG?

This app is available for many devices in different stores like Google play, Amazon webstore, Samsung Tizen, Smasung and etc, you can see in the image all of the stores.

You can download Smart STB for different platforms in their app store
Activation of the Trial period
Step 1: From the app market on your smart tv search, find and install Smart STB App. The app is 7 days is free then you have to purchase the subscription through the below link
https://www.smart-stb.net/smart-stb-activation/
Dear clients,
The app does not come with any TV Services.
You need to configure the app to get TV channels and content.
If you have a Portal URL, please read below how to activate the app.
Please follow the guide to activate your app. You just have to follow the steps below:
Install the app on your device and open it. You will see the following message after a few seconds:
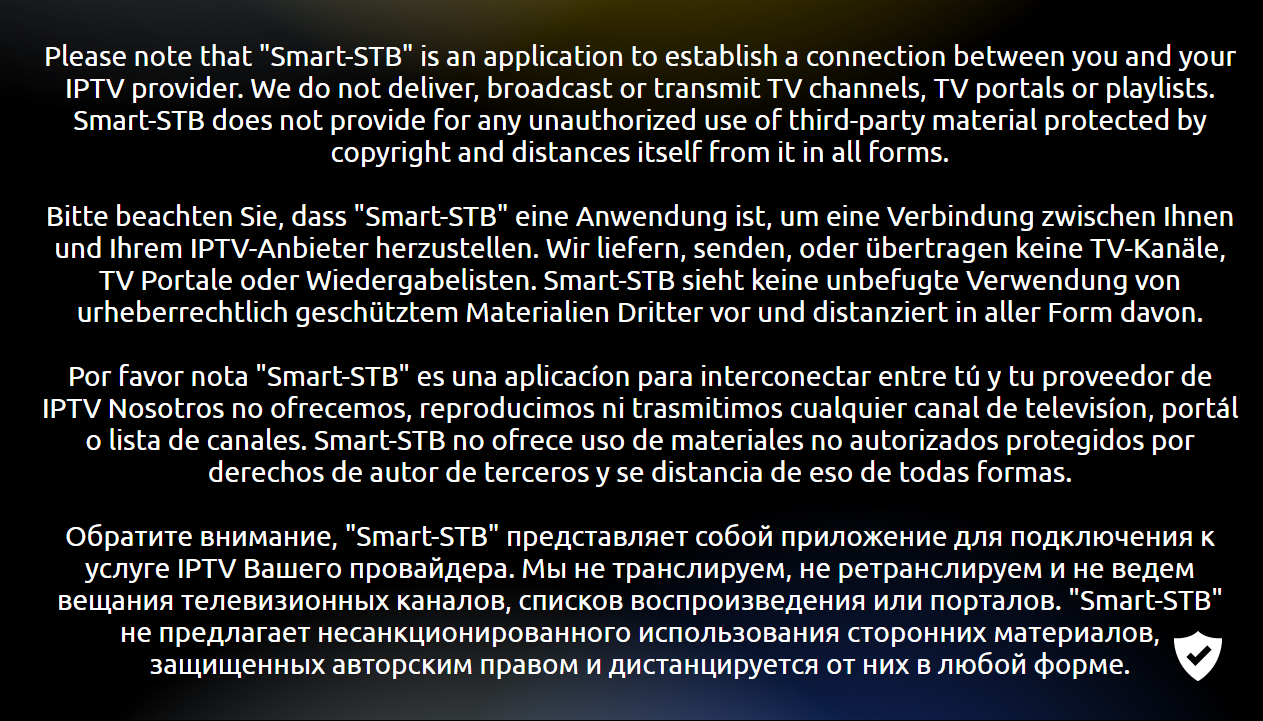
When you see the disclaimer message you should read carefully the information provided, after 10 seconds the following message should appear:
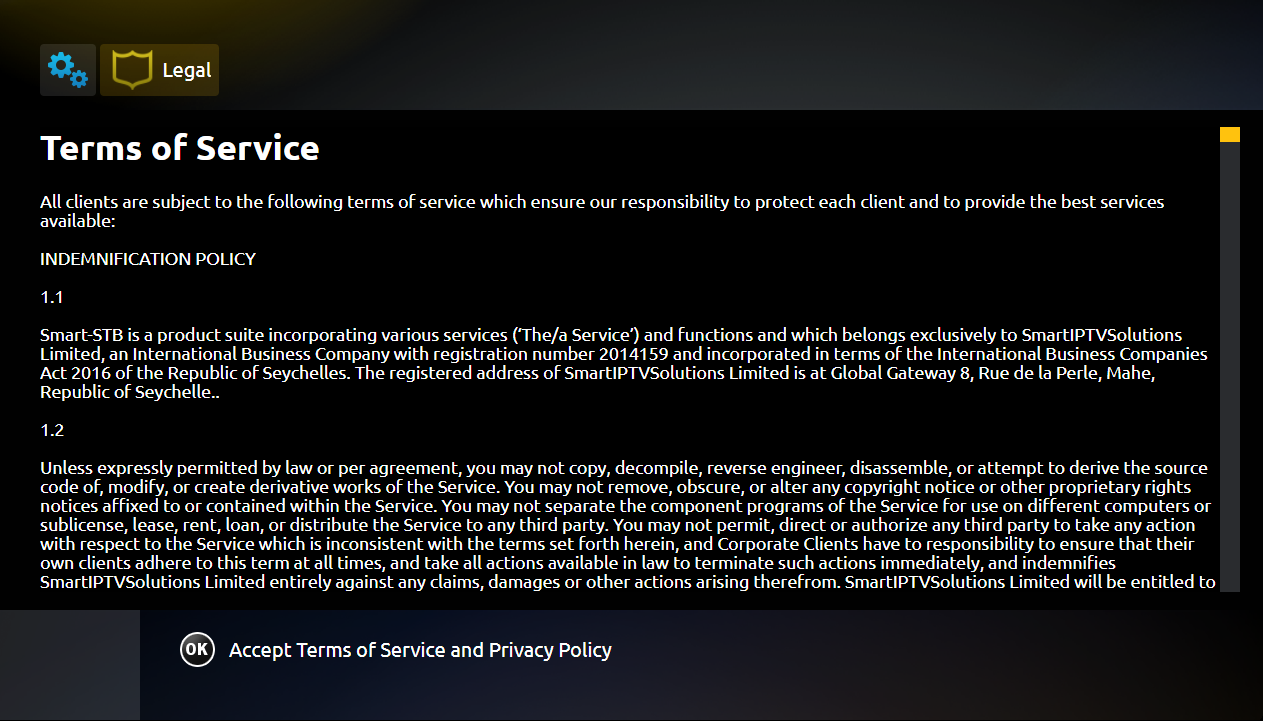
A Terms of Service screen will appear, please read carefully our Terms & Conditions and if you accept them, please press "OK" on your remote control of your TV or if you have a touch-capable device, simply click on the "OK" message in the bottom left of the page.
NOTE! If you don't accept parts or all points of our Terms of Service, please close and uninstall the app.
If you have accepted the Terms & Conditions for using the SmartSTB app you will see the following message to confirm:
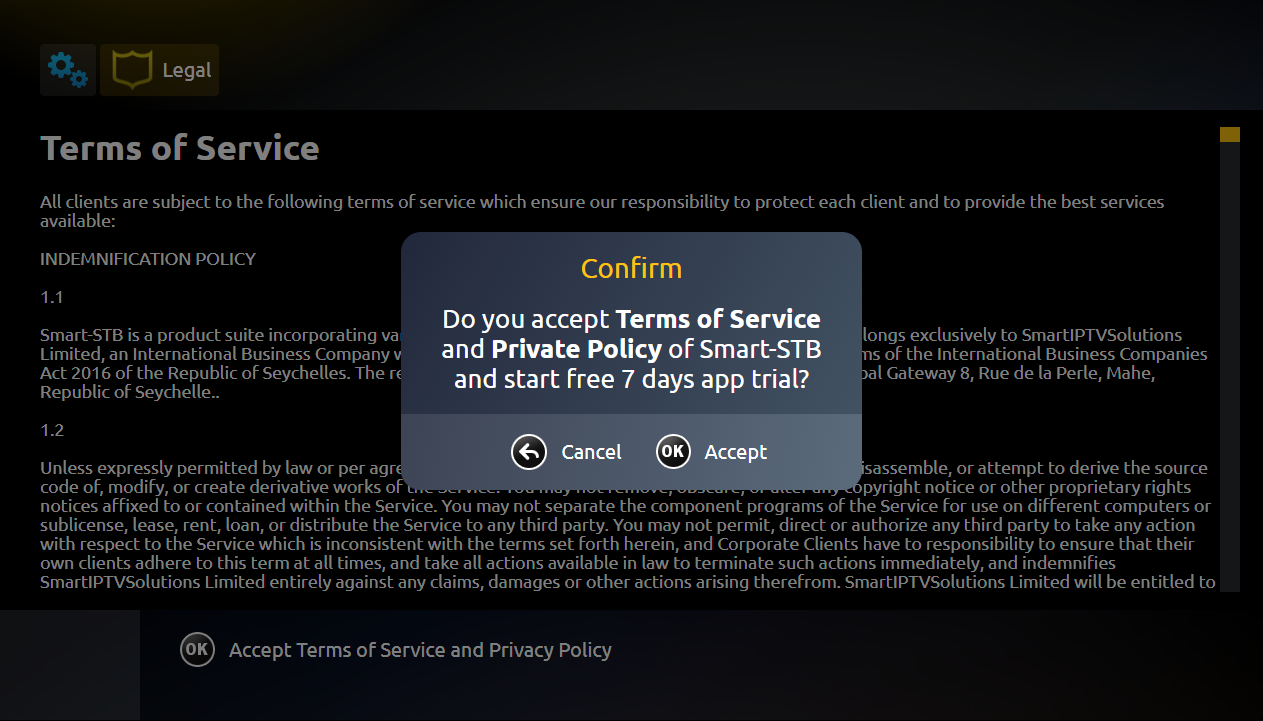
Pressing OK on the Confirm message will lead you to the following screen and activate your 7-day FREE trial:
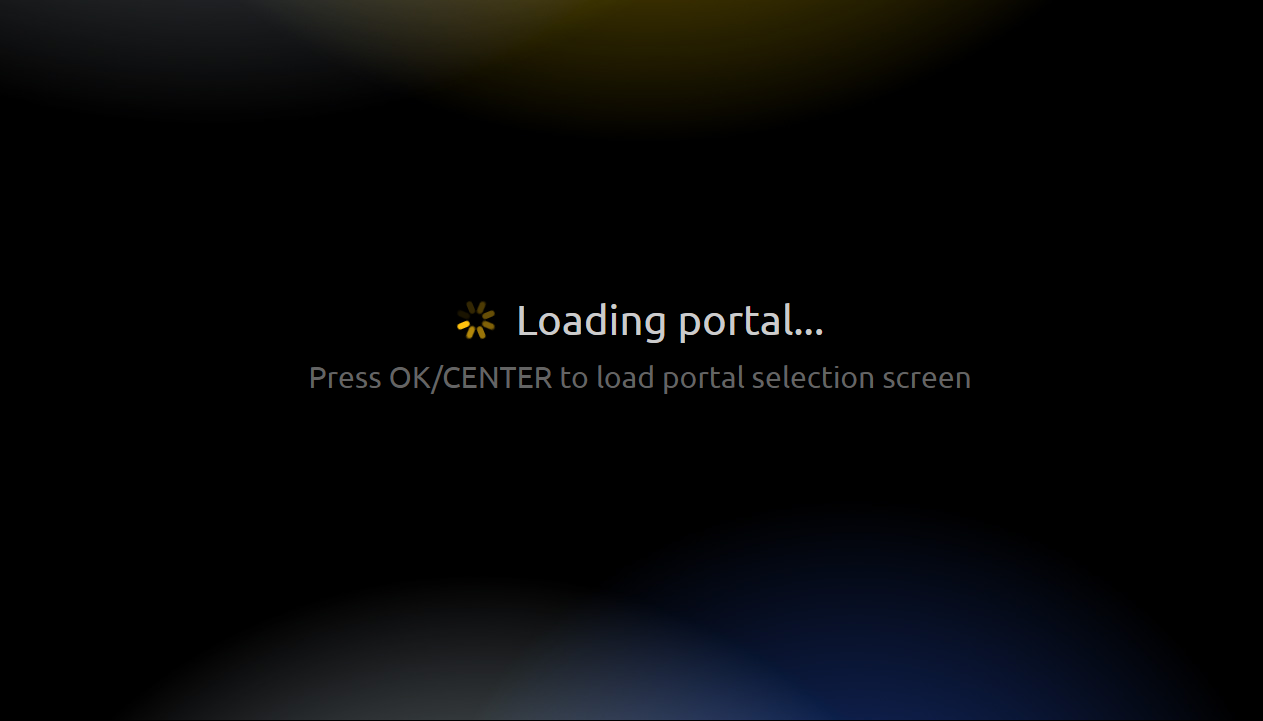
When you see this screen you should press "OK/Center" button or tap anywhere on the screen if you are with touch-capable device so you can see the Portal menu where you can also find the app Settings:
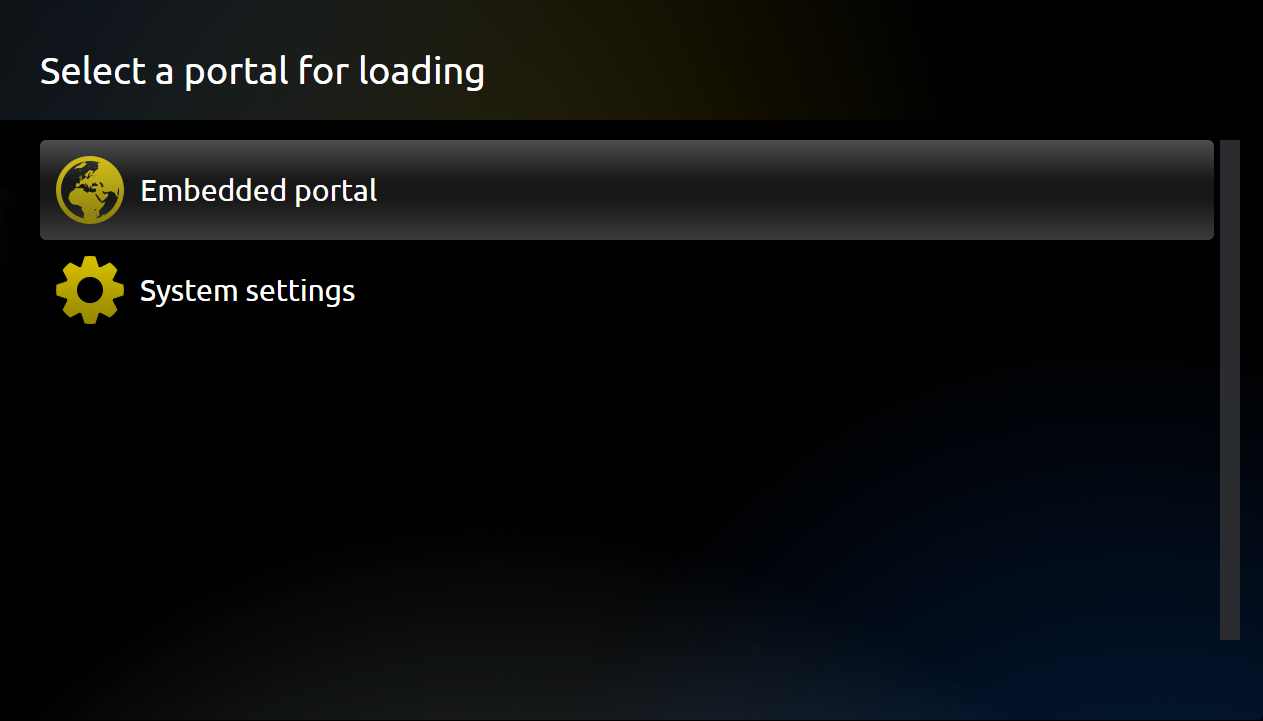
This is the main portal menu where you can see the portals you have and open the app Settings. Initially you will see only the embedded portal which you can use to test the app functionality. In order to see your custom portal given by 3rd party IPTV provider you have to add it. You should navigate to "System settings":
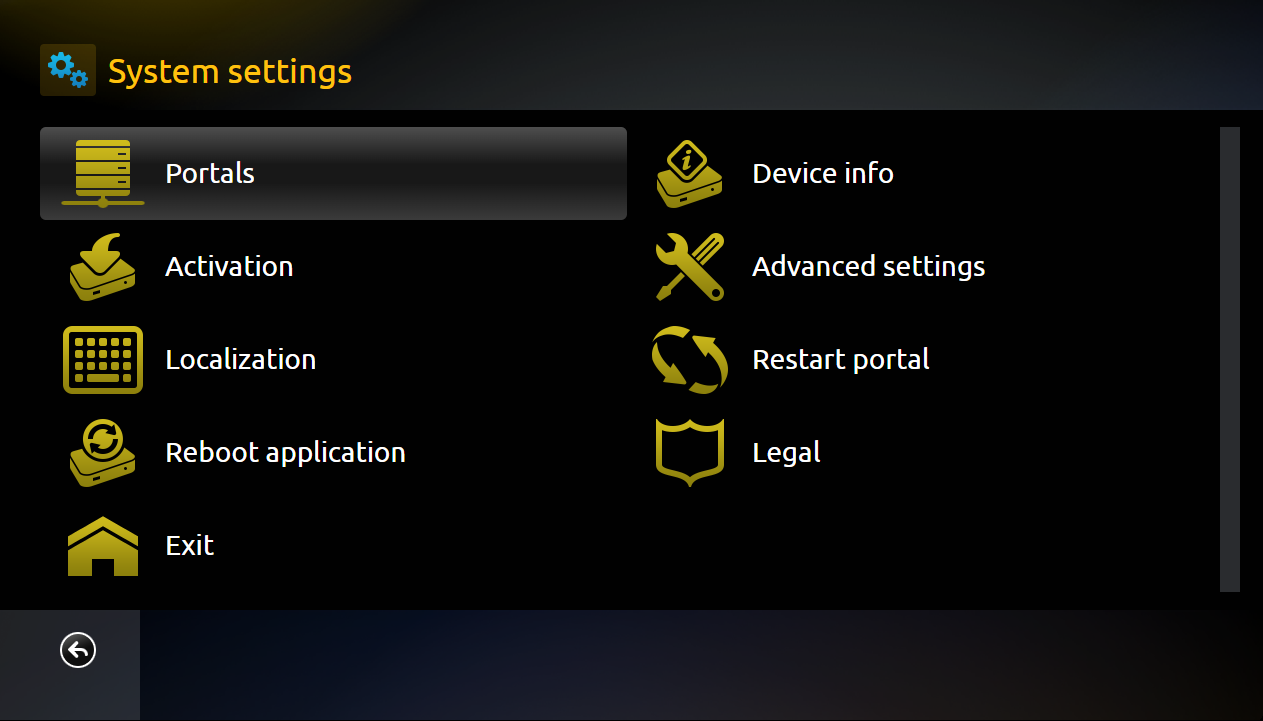
The System settings menu will open where you can find more information about the app and do some further and additional settings. To add your custom portal URL given by your 3rd party IPTV provider you should navigate to the "Portals" menu:
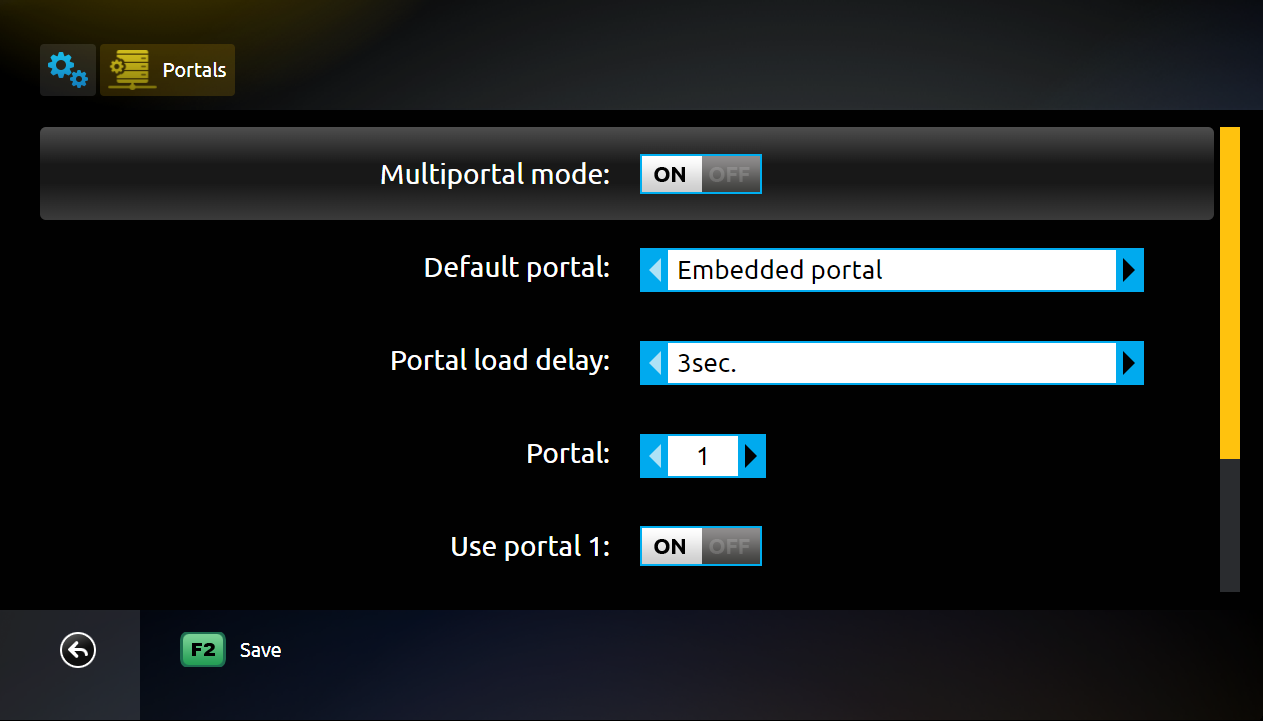
The portal menu will appear where you can set your custom portal, the Multiportal mode should be enabled in order to do anything in this section. The "Default Portal" option changes the default portal which will be loaded when the app is lauched, initially this is the embedded portal, but you can change this setting once you add a custom portal. The "Portal" option allows you to add up to 8 portals for "Full" licenses and it's also available for trial users. When you point to a specific portal you should point to "Use portal" option and enable it so you can add the details. Please note you should enable only the positions of the portals you want to use, the app won't allow you to enable portals and leave them empty. After you have activated the "Use portal" option you should scroll down the page to see the options for Portal name and URL:
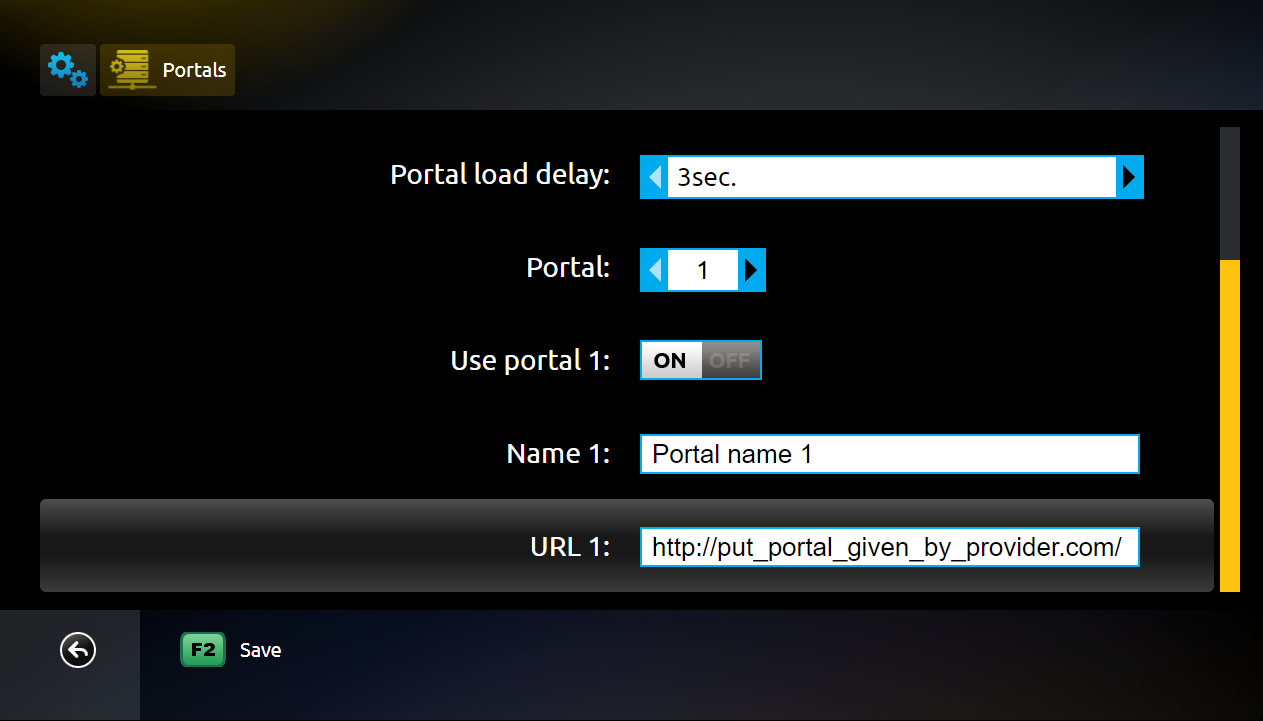 (Example device, information on above picture is for demonstration purposes, please do NOT enter this on our app and site!
In the "Name" gap you can enter whatever you want, we suggest you to put something easy to understand in case you have multiple providers so you can easily choose the one you wish to load. In the "URL" field you should put the portal URL given by your 3rd party IPTV provider. Please note that we support portal URLs which are based on ministra/stalker platform, alternatively you can put an M3U URL if your provider does not support Ministra/Stalker portal for some reason. We strongly recommend you to use ministra/stalker portals for best app experience as M3U functionality may be limited on some devices. Below you can find a few examples of correct Ministra/Stalker URLs:
http://some-portal.tld/stalker_portal/c/index.html
http://some-portal.tld/stalker_portal/c
http://some-portal.tld/c/index.html
http://some-portal.tld/c
Please note that you may have to provide your 3rd party IPTV provider some additional information like your Virtual MAC in order the provider to activate your subscription on their side, otherwise you may face the "STB Blocked" message. In this case you should provide your Virtual MAC, which can be found in "Device info" menu from the app Systm Settings:
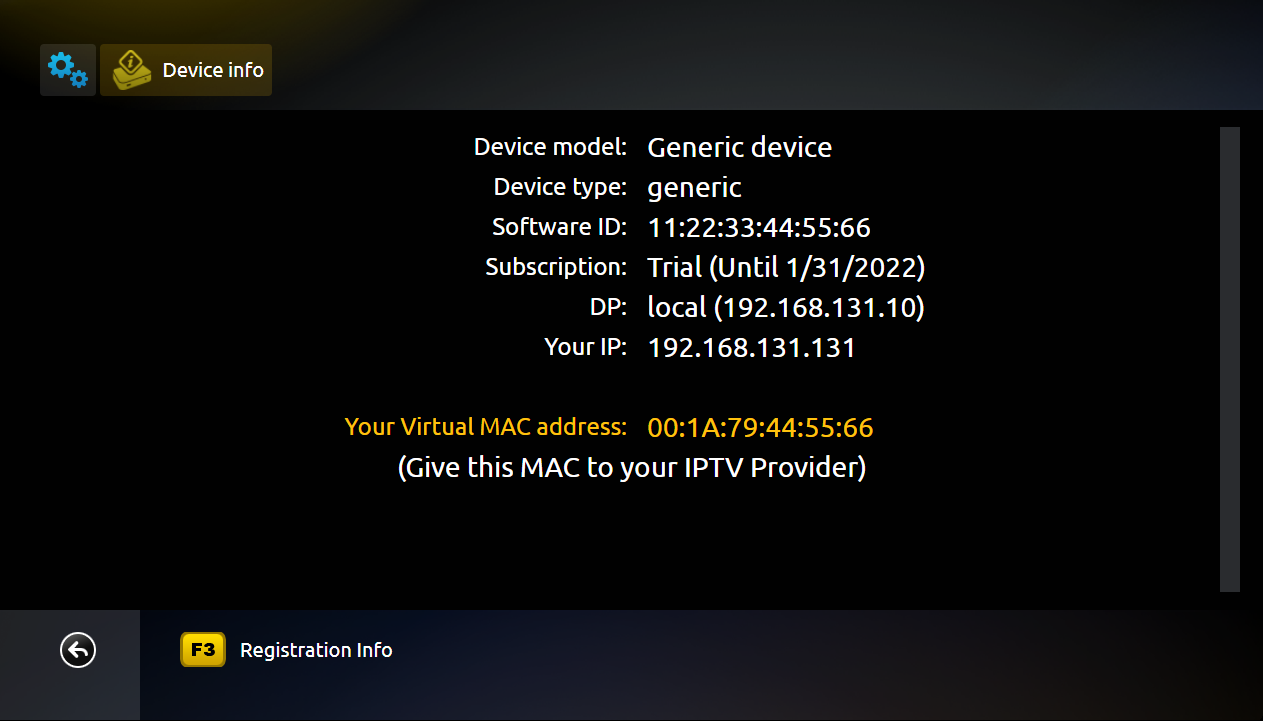 (Example device, information on above picture is for demonstration purposes, please do NOT enter this on our app and site!
From this menu you can check all the information regarding your app installation. You can see your "Device model", the "Device type" which can help you to recongize your platform (e.g. WebOS, Tizen, Orsay, Android, AndroidTV etc.), your Software ID, which is ONLY used for the app licensing, your type of subscription (eg. Trial, Paid, Paid Lifetime etc.) and the expire date if your license is a subscription one. You can also see the Distribution point (DP) you are assigned to based on your location and your IP address. Below that information you can find your Virtual MAC address which you should give your 3rd party IPTV provider to activate your TV subscription on their side.
That's it, your app is now successfully configured to work with your TV provider and you can enjoy watching TV and other content! 🙂
How to get app license
Step:2
To get an app Trial just start the app for the first time and agree to the Terms and Services.
More information about how to get trial: https://www.smart-stb.net/knowledge-base/how-to-activate-the-app/
If you want to get paid license please read below.
You need to go to our site and locate SMART-STB and click it. Then you need to select SMART STB Activation.

When you choose SMART STB Activation you will see this picture:

Picture above is an example.
When you see this picture, you need to enter activation code in the app on your device
-or-
you need to enter Software ID in our site.
You can activate via activation code -or- via software ID.
Use this method that is easier for you.
Please note that you can find your Software ID in “Device Info” menu, choose portal menu or in demo portal.
Pictures below are an example and not a real device.


When you entered a valid activation code in app on your device or software ID in our site you will see something like this on our website:

Picture above is an example, and not a real device.
When you see picture like above, then you need to follow the steps to get paid license.
When you proceed with these steps you will be asked to choose which license you want, enter payment method and when you pass trough this steps you will get paid license.
Step 1: Choose which license you want and choose “Yes” at the bottom of the page.

Picture above is an example, and not a real device.
Step 2: Take a look at your data – software ID, virtual MAC, etc. and be sure that all data is right.
Then choose “Sign up now”.

Picture above is an example, and not a real device.
Step 3: choose payment method.
You can choose between stripe and paypal.
Pictures below are an example, and not a real device.


Step 4: When you see this picture you complete your order and get paid license.
Picture above is an example, and not a real device.
